Public hotspots or Wi-Fi were never as secure as home or worked Wi-Fi because it’s open to everyone. Any experienced middle man can break into the wifi security and keep track of your browsing activity. Hackers can also access your computer through public wifi and steal sensitive data from it. So, it’s always best to protect your Windows 11 PC before connecting to public wifi.
List of 7 Best Ways To Protect Your Windows PC on Public Wifi
Hence, in this article, we will list down some of the key points that will protect your Windows PC on Public wifi. These are general tips, but they do their job pretty well. Let’s check out.
1. Always Use a VPN
As we all know, a role of a VPN app is to encrypt your traffic and make you anonymous. Since VPNs re-route your traffic through its private servers spread across many regions, intermediaries won’t be able to access or steal your precious data. Due to high-quality encryption, it would take a cybercriminal about a month to intercept your data. VPNs act as an extra layer of security, and everyone should be connected to a private server’s IP address before using Public wifi.
2. Keep Your Operating System Updated
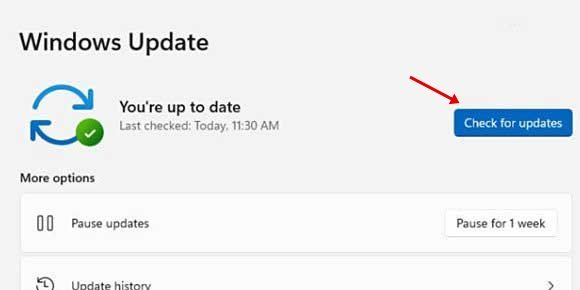
Using Windows 11, you might have noticed that most system updates include bug fixes, patches, and security improvements. Security updates are the essential thing that you should never miss. Even though timely updating the operating system doesn’t eliminate the risk of getting hacked completely, it indeed makes things difficult for cybercriminals. So, it’s always best to keep Windows 11 Updated. To update Windows 11, head to the Settings > Windows Update > Check for Updates and download the available updates.
3. Turn of Network Discovery & Sharing
When network discovery is turned on, your computer can see other network computers and devices. Similarly, your device would be visible to other network computers. So, if you are using public wifi, it’s best to disable this option.
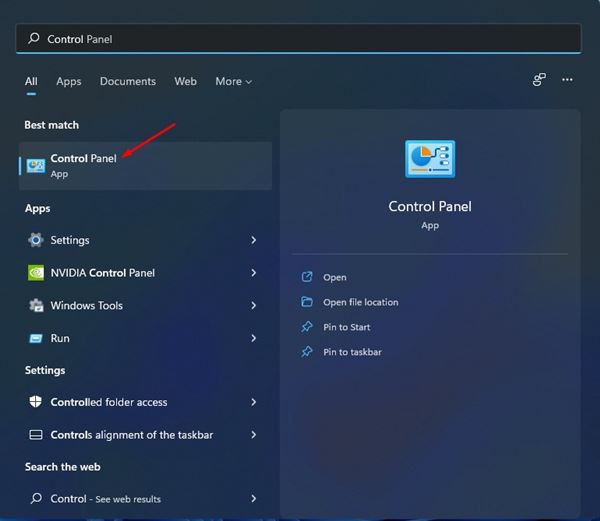
First, open the Windows 11 search and type in Control Panel. Then, open Control Panel from the list.
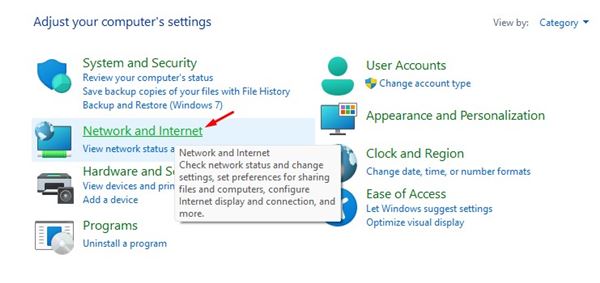
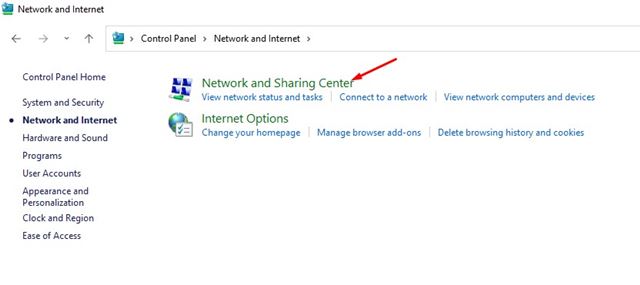
On the Control Panel, click on the Network and Internet option.
Click on the Network and Sharing center on the next page.
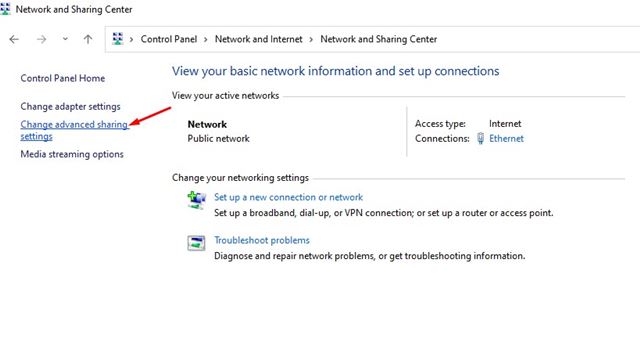
On the left pane, click on the Change Advanced sharing settings option.
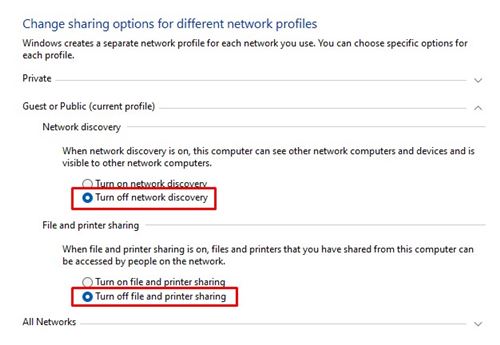
Now, select the Turn off network discovery option under the Network Discovery.
Under the File and printer sharing, select the Turn off file and printer sharing option.
4. Enable the Firewall & Network Protection
Both Windows 10 and Windows 11 include a Firewall system. The firewall system is enabled by default, but a third-party antivirus program often turns it off. The role of a firewall is to protect your PC from unknown threats and hackers. It detects and prevents malicious events or hackers from gaining unauthorized access to your PC.
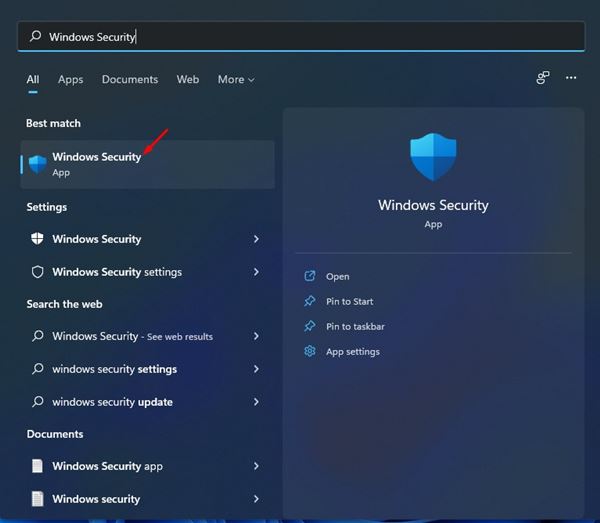
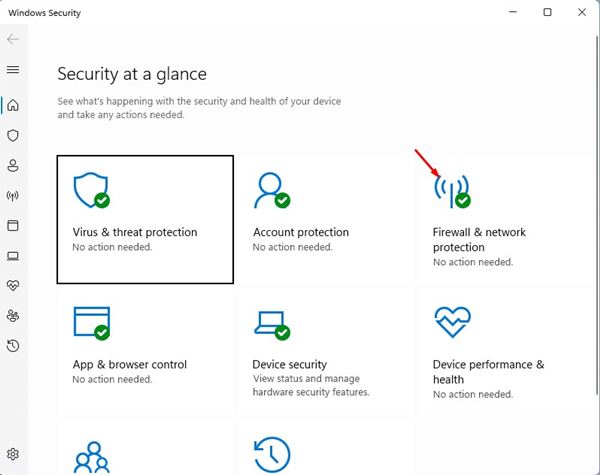
First of all, open the Windows Security app on your Windows 11.
Next, click on the Firewall & network protection option.
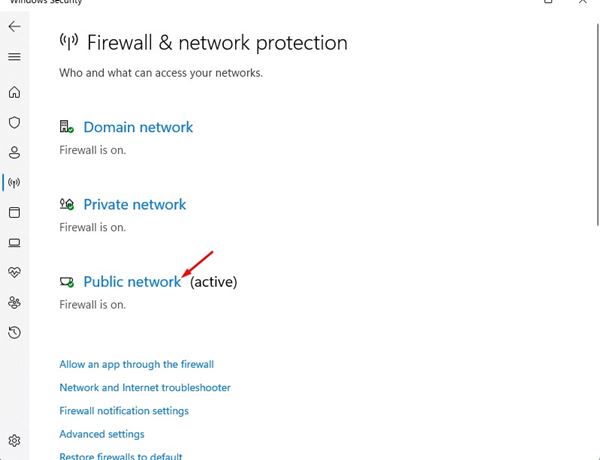
On the next screen, click on the Public Network option.
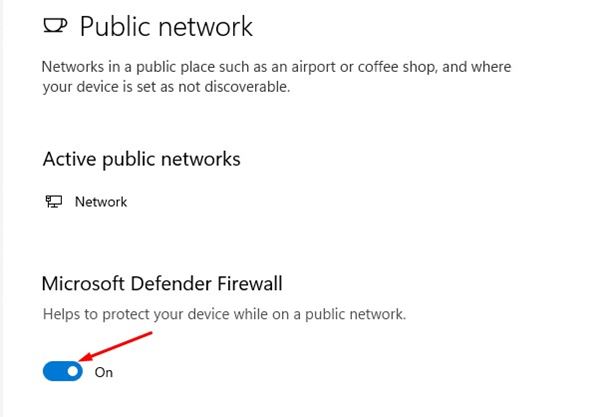
On the next screen, enable the toggle button for Microsoft Defender Firewall.
5. Disable wifi when you are not using
While connecting to a Public WiFI, we are given an option to remember the network. This thing is done to enable the automatic wifi connection. If you have enabled an automatic wifi connection, your wifi adapter will automatically connect to the public network it was once connected to. Hackers might attempt to track your keystrokes or browsing history if this event happens by installing malicious apps. Such apps and services run silently in the background and attempt to connect to the internet to exchange data. So, it’s always best to disable the wifi connection when you are not using it. It will protect your PC and will save your battery life.
6. Always Use HTTPS
You can easily spot a secure website by simply looking at the HTTPS mark on the address bar. If you are not using VPN, don’t open websites that were not HTTPS protected. While entering sensitive details like passwords, ensure that the site has an encrypted connection. Therefore, if you are trying to visit a website on Public wifi, make sure that the website URL starts with HTTPS. If you are using Google Chrome, you can force the web browser always to use secure connections. For that, follow the steps given below.
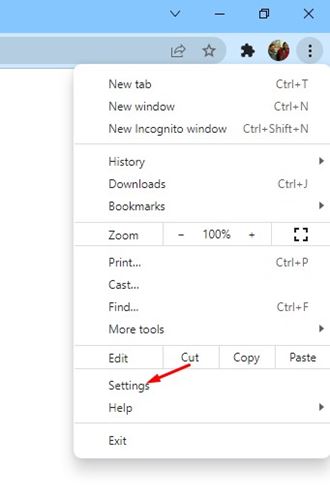
First, open the Google Chrome browser and click on the three dots.
From the list of options, select Settings.
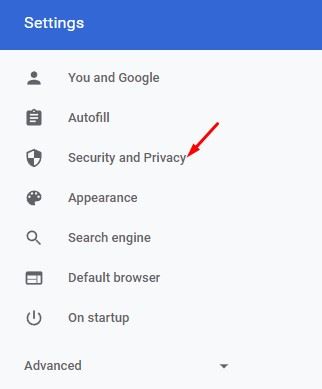
On the Settings page, click on the Security & Privacy option.
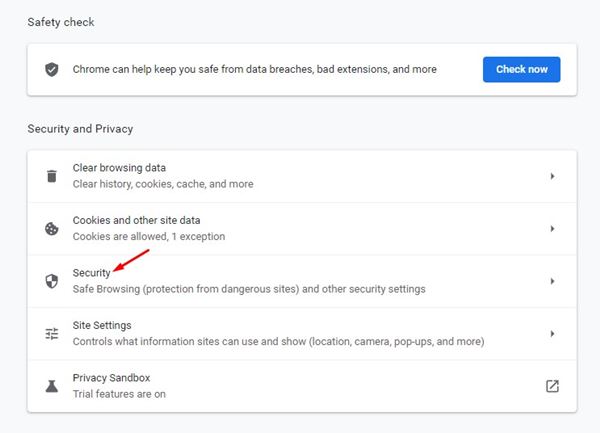
Then, on the right, click on the Security option.
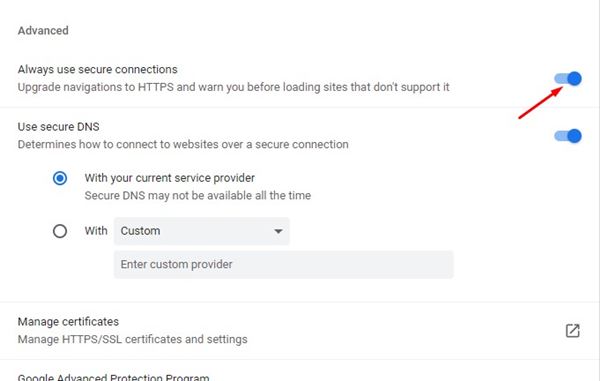
Find and enable the ‘Always use secure connections’ option under the Security.
7. Update Your Antivirus/Internet Security Program
Various antivirus programs and internet security suites provide your wifi protection feature. Also, many security suites these days come with a built-in VPN. So, it’s always recommended to update your security program, especially before connecting to public wifi. These are the several ways to protect your computer while using public wifi. I hope this article helped you! Please share it with your friends also. If you have any doubts about this, let us know in the comment box below.
Δ
